Section 5: Creating a Paid Account
Step 1: Creating a Plan With Billing (Click here to view Flash Video)
Now that you have created a service plan for your own personal use, it is time to create a plan with billing. These are the plans you will be reselling to your customers. A with billing plan is created much in the same way as the service plan, however there are more options for you to control in regards to resources and billing. Since you have all ready created a Unix service plan, only the new steps will be explained.
Click "Info" on the top navigation bar and choose "Plan creation wizards". You should see a screen like the following:
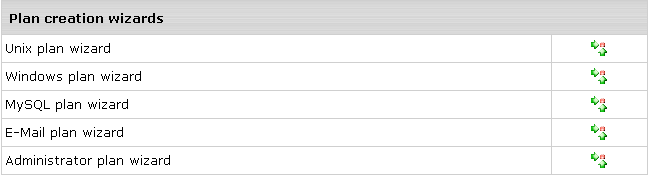
Choose a Windows or Unix plan by clicking the  button to the right of either "Unix plan wizard" or "Windows plan wizard". For this demonstration, we will be creating a Unix plan
With Billing. You should now see the following screen: button to the right of either "Unix plan wizard" or "Windows plan wizard". For this demonstration, we will be creating a Unix plan
With Billing. You should now see the following screen:
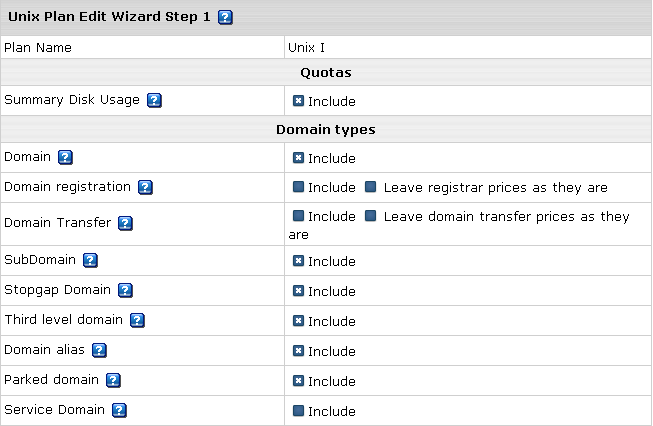
Summary Disk Usage: H-Sphere offers two resource allocation systems - Fixed Quota and Summary Disk Usage. There are three fundamental quotas in any hosting account; Web Space, Database space, and email space. In the Summary Disk Usage system, you can specify one large allocation of space called "Summary Disk Space" and the customer can divide this allocation into web space, database space and email space as they desire.
In the fixed quota system (you must uncheck Summary Disk Usage to use this option), you will have to specify separate allocations for Web Space, Database space and Email Space.
In the Summary Disk Usage system, you have to not only specify the Summary Disk space quota but also the default quotas for Web Space, Database and Email space. The default web space, database space and email space quotas can be readjusted by the customer as they want later (without being charged). You must not specify overage rates (i.e. rates for extra space) for any of these three individual quotas (i.e. web space, database and email space). If you were to specify overage rates for summary disk space and also database space, then the customer may be charged double if they used extra database space and the used summary disk space (sum of web space, database space and email space) also exceeds the available summary disk space quota.
In the fixed quota system, no "Summary Disk Space" quota has to be specified. Only the Web Space, Database space and Email space quotas have to be specified. The customer would be charged for using more resources than allocated in any of these individual quotas. Overage rates for each of these individual quotas must be specified.
You should also know that database quota and email quota are imaginary quotas. You actually specify the number of databases and the quota for each database. Similarly, you have to specify the number of email accounts and the quota of each email account. per database quota X the number of databases would make up database quota. The same applies for email quota. In the Summary Disk usage system, the per database quota for any database and per mail box quota for any mail box can changed by customers without being charged (as long as the sum of the space used in the mail quota, web quota and database quota is below the amount allocated as Summary Disk Space). The per database and per mail box quotas you specify while creating this plan are only the default quotas to start with. It should also be noted that in the Summary Disk usage system, the database quota (per database quota X databases) and email quota (per mail box quota X email accounts) can exceed the summary disk space quota. What will actually be counted against the summary disk space quota is the MB used in the database quota and email quota. Similarly, you can specify a Disk,Web, and, FTP Space quota higher than the Summary Disk Space quota, but what will actually count is the actual number of MB stored in this quota. None of this holds true in the fixed quota system. If more email accounts are created then allowed, or the per mail box quota of an individual mail box is increased, the customer will be charged.
The summary disk space system offers the customer the flexibility to decide how to use their single space allocation called "Summary Disk Space" while in the fixed quota system, the customer would have to deal with three individual quotas. For this demonstration, we will create a plan based on the summary disk usage system.
Service Domain: Make sure this option is unchecked.
Choose the other options as you desire, and move down to the billing section:
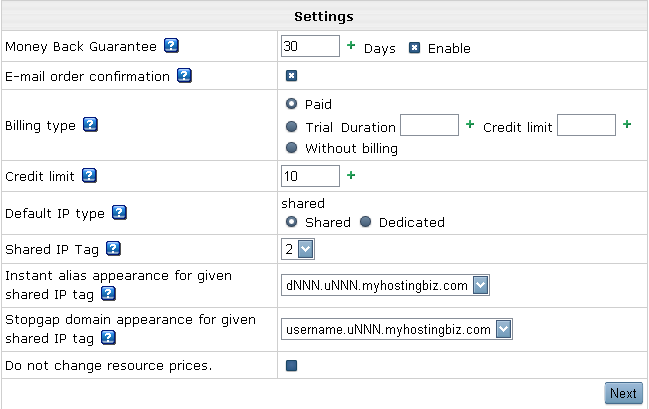
Money Back Guarantee: Allows your customers to request a refund within the Money Back guarantee period.
Billing Type: Both "Paid" and "Trial" Billing Type options enable billing on this plan. The "Trial option allows your customer to try this hosting plan without paying anything while signing up. After the duration is over, the customer must pay in order to continue to pay their services with you. Please note that if the customer decides to pay, he or she will also have to pay for the Trial duration and any resources used during that period.
Credit limit for the trial period specifies how much the customer can buy during their trial.
Credit Limit: This specifies how much worth of resources the customer can buy without having to pay immediately. Once the customer's debt exceeds the credit limit, they cannot buy any more resources or use his control panel until they pay.
Default IP type: Specifies whether the domains on this account will be created with a dedicated or shared IP address by default. It's strongly recommended you leave this as Shared. Resellers have limited number of dedicated IP's available.
Shared IP Tag: Please leave as-is.
Instant Alias & Stop Gap appearance: Leave both options as is.
Demo only mode: Leave this option unchecked.
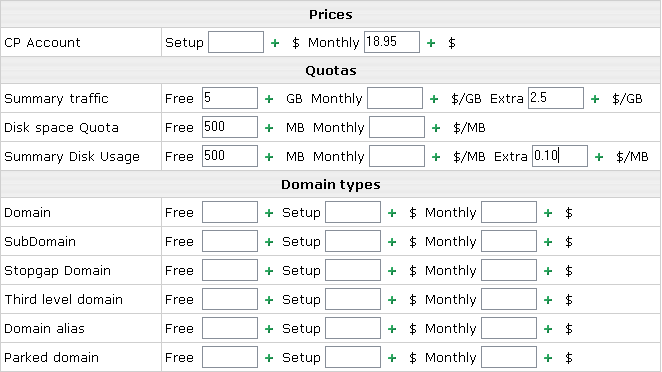
Click next, and you should see the following screen:
Before specifying your pricing structure you should open a new browser window and login to the TOP LEVEL of your account (as described in Section 1. From the top navigation bar click "Billing" and choose "Reseller Price". You should see the following screen:

The above will show you a list of what we charge you for specific resources. It's a good idea to keep these prices in mind while setting up your plan pricing structure. For example, if we charge you $1.00 for an additional IP address (above what you were given free) than you don't want to charge you customers any less than $1.00 for an additional IP. If you charge less, than you will end up losing money. In most cases you would charge your customers slightly more than what we charge you. For example, we charge you $1.00 for an additional IP, in turn you charge you customer $1.50 for an additional IP and keep the $0.50 profit. Note: please do not go by the above pictured pricing structure as it may vary depending on your plan with us. Always login to your account and check the pricing structure from "Reseller Price" under the "Billing" menu.
Free: Specifies how many free units of a resource a customer would get. If you want to allow unlimited units of the resource, leave blank and also leave blank setup, monthly and extra.
Setup: Specifies the one-time fee a customer would be charged for buying/activating more resources than allocated. To charge no setup fee, leave blank.
Monthly and Extra: Many of the disk usage resources have two columns called Monthly and Extra. Monthly specifies how much a customer would be charged if they bought extra amounts of that resource, and Extra specifies how much the customer would be charged if they used more of that resource during account operation. Normally "Extra" should be set higher than "Monthly" to encourage customers to buy additional resources in bulk. If only a "Monthly" and no "Extra" field is available, it means that the customer will not be allowed to exceed this resource while in account operation but must buy beforehand to use more.
CP Account: This is the actual amount you want to charge monthly for the plan. For example, if you wanted to charge $18.95 a month than you would enter 18.95 in the "Monthly" box. The "Setup" box is optional, this is if you want to charge a one time setup fee. If you want setup to be free, leave the box blank, otherwise enter in a dollar value for it.
Summary Traffic:This is the total amount of transfer traffic you want to allow your customer to have. Monthly is what you want to charge them Per Gigabyte if they exceed their total allowed transfer traffic.
Summary Disk Usage: A detailed explanation is provided above. Specify the amount you want to allocate to this plan and its "Monthly" and "extra".
Disk Space Usage: Specifies the default web space. This should be set to the same value as the Summary Disk Usage. Only the actual usage of this quota counts towards the Summary Disk Space usage and not how much you allocate. You could even allocate more disk space than the summary disk space usage and the customer could increase or decrease this quota without being charged.

All of the above resources are optional. You can set the prices individually as you see fit, or you can leave them all blank if you do not want to charge extra for these resources.

All of the above resources except for "Mailbox quota" are optional.
You can set the prices individually as you see fit, or you can leave them all blank if you do not want to charge for these resources.
Mailbox Quota: Specify the total amount of space the customer is allowed to use for their mailboxes. Remember, since we are creating a plan based on the Summary Disk Usage system, you should not specify monthly overage charges here.
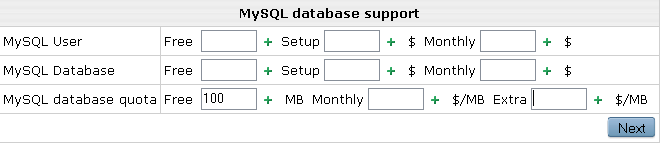
MySQL database quota: Specify the total amount of MySQL database space the customer can you. Remember, since we are creating a plan based on the Summary Disk Usage system, you should not specify monthly overage charges here.
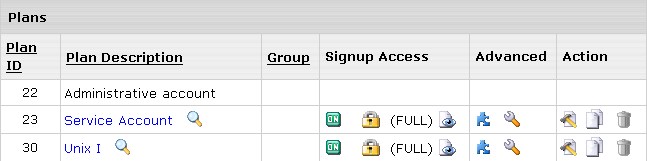
When finished, click the "CREATE Unix X" button. You should now see a screen like the following:

The  button allows you to edit the plan resources. button allows you to edit the plan resources.
The  button allows you to edit the plan settings (Click here to view Flash Video on how to create Billing Periods). button allows you to edit the plan settings (Click here to view Flash Video on how to create Billing Periods).
The  button allows you to duplicate the plan. button allows you to duplicate the plan.
The  button allows you to edit the plan. button allows you to edit the plan.
The  button allows you to delete the plan. button allows you to delete the plan.
When you are satisfied with the plan you can click the  button to the right of your new Unix plan to allow signup access. Your screen should now look similar to this: button to the right of your new Unix plan to allow signup access. Your screen should now look similar to this:
To make sure everything is working properly you should do a test signup to your new Unix I plan. Click the  button to the right of your new Unix I plan to being the signup process. The signup process is almost identical to what we covered in Section 4 - Step 2 except when you get to the domain setup page you will not see the service domain option. This is because we are creating an account on a paid plan, not a service plan. button to the right of your new Unix I plan to being the signup process. The signup process is almost identical to what we covered in Section 4 - Step 2 except when you get to the domain setup page you will not see the service domain option. This is because we are creating an account on a paid plan, not a service plan.
|