Section 6: Account Management
Step 1: Moderating Accounts
In the last section you signed up a test account to your newly created Unix plan. That account did not get created automatically as you selected "Check" as a payment method and payment for that account has not yet been received. When and if you decide to add a Payment Gateway/Merchant account to accept credit cards in real time, accounts will be created automatically because payment is received automatically upon the completion of the signup process. Detailed information regarding how to setup real time credit card processing via a Payment Gateway can be found under our reseller support section.
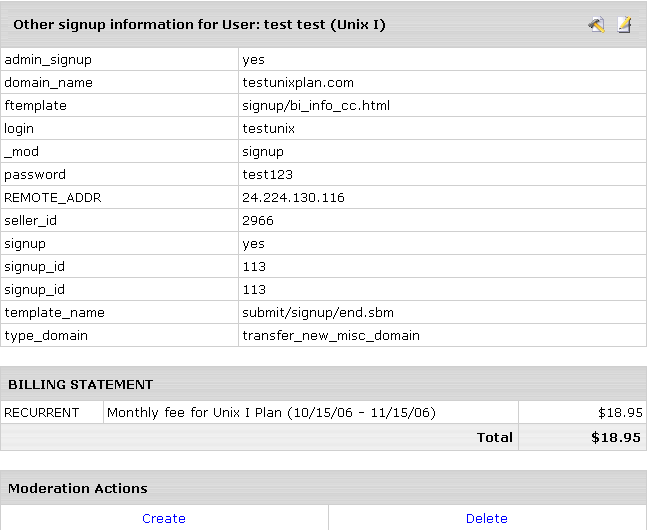
The test account you created is currently in what is referred to as "moderation". Moderation means that you must manually activate the account through your reseller control panel before it can be used. Typically you do this after receiving payment for the account (i.e. waiting for a check payment). To view accounts awaiting in moderation click "Signup" on the top navigation bar and choose "Moderate". You should see a screen similar to this:

To view details of the account click on the username (in this case it's unixtest). The screen that will come up gives you all of the details of the signup. If you scroll down to the bottom you should see the following:
To create the account, simply click the "Create" button. After the account has been created, you should see the following screen:
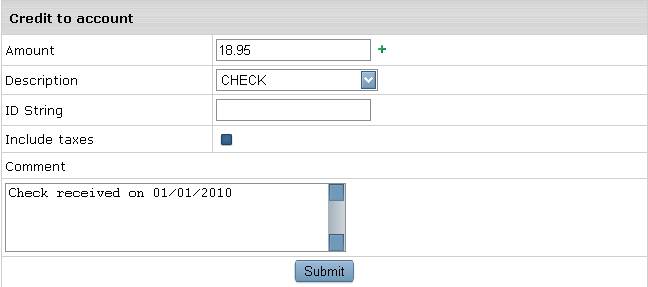
In this case we are going to pretend that we received a check from the customer for $18.95. So we credit the account $18.95 by typing "18.95" in the "Amount" field. After you select the Description and added a Comment (optional) click "Submit".
Step 2: Finding Accounts
In Step 1 we created our test account, now we are going to show you how to find it. To search for all accounts click "Search" on the top navigation bar and choose "Generic". You should see the following screen:
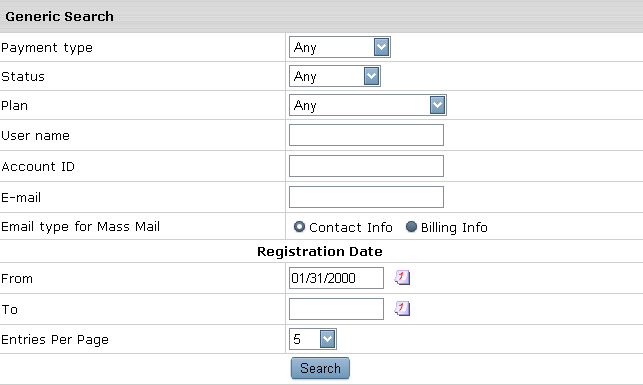
Leave everything the way it is and click "Search". You should now be taken to a screen like the following:
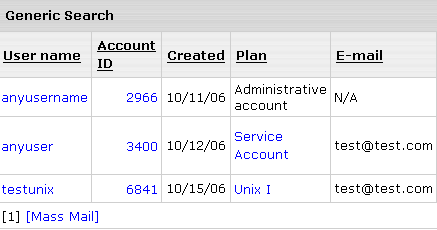
As you can see in the above picture, the third account listed is "testunix", which we just finished moderating in Step 1. If you click on the "Account ID" (in this case it's 6841) you will get detailed information on the account.

The  button allows you to see a listing of billing statements related to this particular account. button allows you to see a listing of billing statements related to this particular account.
The  button allows you to set the billing period start date. button allows you to set the billing period start date.
The  button allows you to charge the account for additional services. button allows you to charge the account for additional services.
The
 button allows you to log into the End User control panel. button allows you to log into the End User control panel.
The  button allows you to suspend the account. button allows you to suspend the account.
The  button allows you to delete the account. button allows you to delete the account.
|