|
Adding Dedicated Servers
To add templated and non-templated
(custom-built) servers:
- Go Dedicated Servers -> Manage Servers and click Add new Dedicated Server. You will be taken
to the following form:
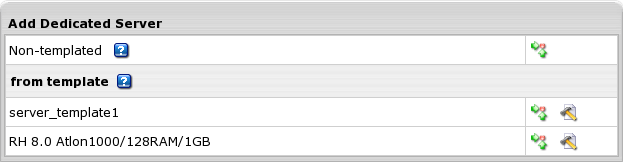
* If there are no dedicated server templates,
you'll be able to add only non-templated servers.
- Click the Choose icon next to the type of server you are adding.
- Adding Templated Servers
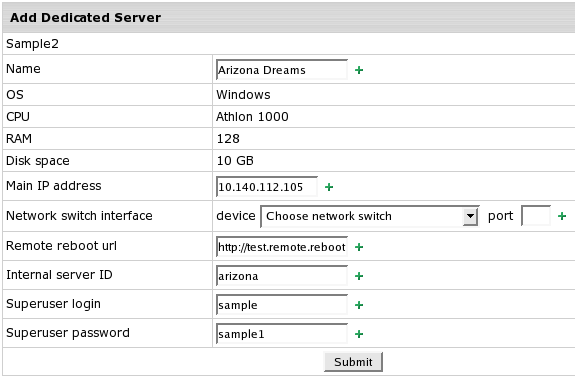
Name: this name will be used to identify the server in the system, both by you and your users.
Main IP address: when adding a dedicated server, you can assign only one IP to it. Read how to
add extra IPs.
Network switch interface - choose a network switch from available
in the system and its port assigned to the server.
Remote reboot url - url for online rebooting.
Internal server ID - this id will be known only to you.
Superuser login - self-explanatory.
Superuser password - self-explanatory.
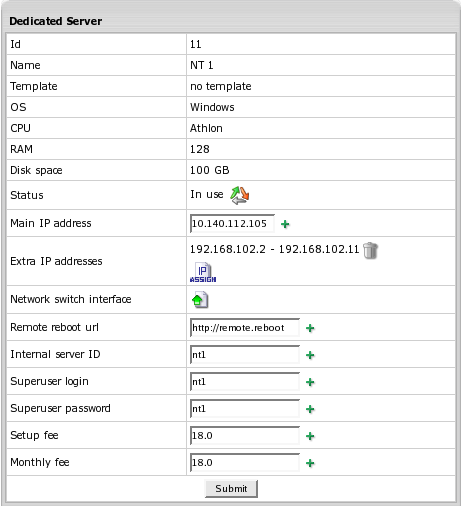
- Adding Non-templated Servers
Enter the same parameters as for templated servers and define setup and monthly fee.
When you've added a server, it becomes available which means it can be assigned to
users under dedicated server plans. Templated servers can also be picked up by
users from their control panels.
Editing Dedicated Servers
Regardless of dedicated server status, you can edit the following settings using the Dedicated Servers ->
Manage Servers menu. Don't forget to change the edited parameters physically. After you edit a taken server, make sure
to inform its owner about the new server parameters.
Deleting Dedicated Servers
Only dedicated servers of Disabled and Clean up status can be deleted from the system.
|